Pruning
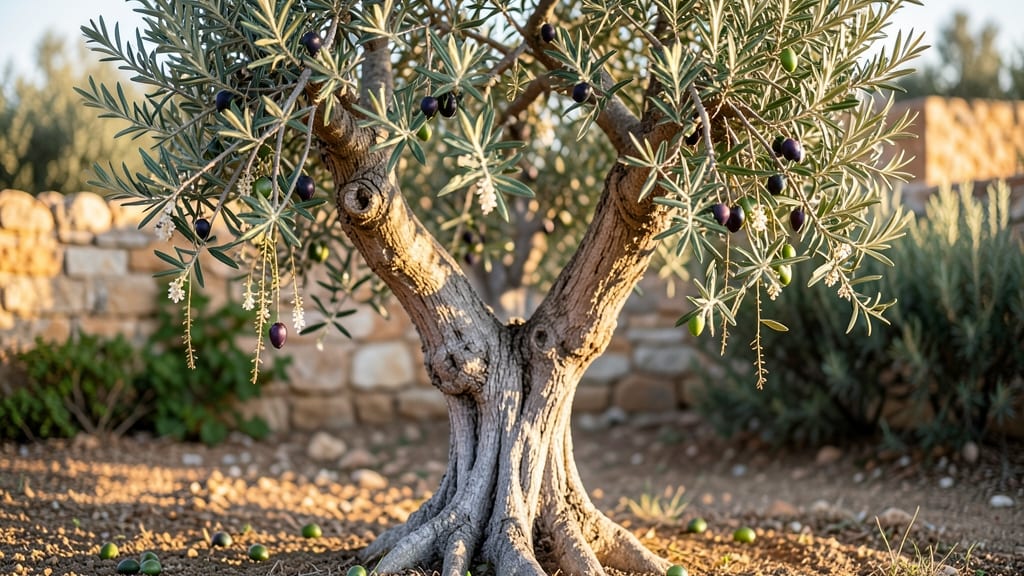
Growing an olive leaf tree (Olea europaea) brings Mediterranean charm to your yard—silver-green foliage that stays lush all year. 🌿 I’ve pruned mine for five seasons now, and the secret isn’t just cutting branches; it’s shaping the tree to thrive where you live, whether you want fragrant leaves, small olives, or just a striking ornamental specimen.
The right approach turns this drought-tolerant beauty into a low-maintenance star.
These trees love full sun (at least 6 hours daily) and well-draining soil—sandy or rocky works best, but they’ll adapt if you amend heavy clay. Most varieties handle heat and drought once established, making them perfect for coastal climates or hot, dry regions.
Container growing is possible too, but expect slower growth unless you use a 15+ gallon pot and prune aggressively. The key is balancing their Mediterranean roots with your local conditions.
With strategic pruning, you’ll encourage dense growth, prevent leggy branches, and even shape it into a small tree or shrub. I prune mine in late winter or early spring—just before new growth starts—to keep it compact and encourage fresh, vibrant foliage.
The result? A tree that stays neat, healthy, and productive for decades, whether you’re harvesting olives or admiring the leaves.
They’re surprisingly beginner-friendly once you know the basics: water deeply but infrequently, avoid over-fertilizing, and prune with purpose. Even in containers, they reward patience with silver-green leaves that shimmer in sunlight and a sturdy, long-lived structure. Ready to grow one that lasts?
📚 In This Guide
- What you need
- Instructions
- Tips and common mistakes
- Wrapping up and next steps
What you need
- ● Olive leaf tree (Olea europaea) – Choose a healthy sapling or mature tree (dwarf varieties like 'Arbequina' or 'Frantoio' work well for containers).
- ● Well-draining soil mix – 60% potting soil, 30% perlite/sand, and 10% compost (for containers). For in-ground planting, amend clay soil with coarse sand or gravel.
- ● Pruning tools: Bypass pruners (for clean cuts on small branches)
- ● Loppers (for thicker branches, ½–1 inch in diameter)
- ● Pruning saw (for branches >1 inch thick)
- ● Disinfectant – 70% isopropyl alcohol or a 10% bleach solution (to sterilize tools between cuts).
- ● Glove – Heavy-duty gardening gloves (olive leaves can be sharp!).
- ● Root stimulator – Mycorrhizal fungi or a liquid rooting hormone (for repotting or grafting).
- ● Slow-release fertilizer – Balanced 10-10-10 or olive-specific fertilizer (apply sparingly in early spring).
- ● Container or trellis – If growing in pots, use a 15–20 gallon container with drainage holes. For espalier training, add a sturdy trellis.
- ● Mulch – Wood chips or straw (to retain moisture and regulate soil temp).
- ● Shade cloth – 30–50% coverage for young trees in hot climates.
How to prune an olive leaf tree for year-round growth
Pruning isn't just about shaping—it's how you coax that olive leaf tree into dense, fragrant foliage all year.
✂️ Step 1: Time Your Pruning for Maximum Recovery
Prune in late winter or early spring, just as new growth begins. This timing ensures you cut before the tree's active season, allowing it to heal and produce fresh foliage before summer heat arrives. Avoid pruning in fall—new growth won't harden off before winter, leaving tender branches vulnerable to frost damage.
Watch for the first pale green buds along the stems—those signal the tree is waking up. If you prune too early, you'll remove potential growth points. Too late, and you risk stressing the tree before it can recover. I like to prune after the first three warm days in early spring, when the soil temperature reaches 55°F at the root zone.
🌿 Step 2: Remove Dead, Diseased, or Crossing Branches First
Start by cutting out any dead wood—these branches are gray, brittle, and snap easily when bent. Next, remove branches with mushroom-like growths or blackened spots, as these indicate fungal infections. Use sterilized pruners (wipe with rubbing alcohol between cuts) to prevent spreading disease to healthy branches.
Look for branches that cross or rub against each other—they'll eventually tear open the bark, creating entry points for pests. Cut the smaller of the two branches at its base. If both are equal in size, remove the one growing upward to maintain an open canopy. This step ensures your tree stays healthy before you focus on shaping.
✂️ Step 3: Thin the Canopy for Airflow and Light Penetration
Step back and assess the tree's overall shape. Olive leaf trees thrive with open, airy canopies—this prevents fungal diseases and encourages uniform growth. Remove 20-30% of the foliage by selectively cutting back branches that are growing inward or too densely packed. Focus on the inner third of the tree, where light struggles to reach.
Make cuts just above an outward-facing bud or leaf node—this directs new growth away from the center. Avoid "heading back" (cutting back to a leaf or stem) unless you're training the tree for a specific shape. Olive leaf trees respond best to thinning cuts, which reduce stress and promote stronger regrowth.
☀️ Step 4: Shape the Tree for Balance and Structure
Now it's time to refine the tree's form. Olive leaf trees naturally grow in a rounded, bushy shape, but you can encourage a more formal look with strategic cuts. Prune to maintain a central leader (main upward-growing branch) if you want a tree-like appearance, or allow multiple leaders for a fuller, shrub-like habit.
Cut back the longest branches to just above a side bud to encourage branching. Avoid cutting into old wood—olive leaf trees are slow to regrow from large cuts. If a branch is too long, make a gradual reduction cut (shortening it by a third) rather than removing it entirely. This maintains the tree's structure while stimulating bushier growth.
🪴 Step 5: Clean Up and Monitor for New Growth
After pruning, rake up all debris and dispose of it in the trash—not the compost pile—to prevent fungal spores from reinfecting the tree. Sterilize your pruners again with rubbing alcohol, then store them in a dry place. Water the tree deeply at the base to help it recover, but avoid wetting the leaves to reduce the risk of disease.
Within 4-6 weeks, you should see new pale green shoots emerging from the pruned areas. If growth is slow, apply a balanced fertilizer (10-10-10) in early spring to support recovery. Avoid heavy pruning in the same year—olive leaf trees respond best to light, annual pruning rather than aggressive cuts.
Tips & tricks for perfect olive leaf tree pruning
These pro techniques will help you transform your olive leaf tree into a lush, fragrant powerhouse year after year.
Seasonal Timing is Everything: The late winter to early spring window is non-negotiable for olive leaf trees. I've seen gardeners prune too early and miss the growth surge, or too late and stress the tree before summer. That 55°F soil temperature threshold is your real cue—stick a soil thermometer 2-3 inches deep. If it's below 55°F, wait. The first pale green buds are your visual confirmation that the tree is ready to respond to pruning.
Disease Prevention Starts at Step 2: Sterilizing your pruners between cuts isn't just good practice—it's essential. I keep a small bottle of rubbing alcohol in my pruning kit and wipe blades after every 3-4 cuts, especially when removing diseased branches. The mushroom-like growths you're cutting out contain fungal spores that can jump to healthy branches if your tools aren't clean. Think of it like surgical prep for your tree's wounds.
Canopy Thinning Strategy: When you're removing that 20-30% of foliage in Step 3, focus on creating "light tunnels" through the center. I visualize removing branches like removing veins from a leaf—you want to maintain the overall shape while allowing light to penetrate. The inner third is your priority, but don't neglect the outer branches that might be growing straight up instead of outward. This balanced approach prevents that "Christmas tree" look where all growth is concentrated at the top.
Gradual Shaping Pays Off: That gradual reduction cut (shortening by a third) in Step 4 is where the magic happens for olive leaf trees. Instead of making dramatic cuts that create large wounds, you're encouraging the tree to grow bushier from the remaining branches. I've seen dramatic transformations after just one year of this method—trees that went from sparse to dense and fragrant. The key is patience: olive leaf trees respond slowly but consistently to this gentle approach.
Pro Tips for Olive Leaf Tree
- These pro techniques will help you transform your olive leaf tree into a lush, fragrant powerhouse year after year.
- Seasonal Timing is Everything: The late winter to early spring window is non-negotiable for olive leaf trees.
- Disease Prevention Starts at Step 2: Sterilizing your pruners between cuts isn't just good practice—it's essential.
Frequently asked questions
Got questions about nurturing your olive leaf tree? You’re not alone—growing these resilient plants comes with its own set of curiosities! Below, we tackle the most common queries to help you prune with confidence and keep your tree thriving year-round.
How often should I prune my olive leaf tree?
Prune your olive leaf tree once a year, ideally in late winter or early spring before new growth begins. Light shaping trims can be done in summer, but avoid heavy pruning during extreme heat or cold. Pro tip: Never prune more than 25% of the foliage at once—olive trees are slow to recover!
Can I prune an olive leaf tree at any time of year?
While olive leaf trees are drought-tolerant, avoid heavy pruning in fall or winter—this can stress the tree and leave it vulnerable to frost damage. Summer trims are fine for minor adjustments, but save major pruning for dormant season (late winter/early spring) for best results.
What if my olive leaf tree isn’t growing after pruning?
If your tree seems stagnant, check for over-pruning, poor drainage, or nutrient deficiencies. Olive trees thrive in well-draining soil—amend heavy clay with sand or gravel. Apply a balanced fertilizer in spring, and ensure it gets 6+ hours of sunlight daily. Patience is key; olive trees grow slowly!
Can I propagate olive leaf trees from cuttings?
Yes! Take 4–6 inch cuttings from healthy, non-flowering branches in late spring or early summer. Dip the cut end in rooting hormone, plant in a mix of perlite and peat, and keep moist (but not soggy). Roots typically form in 4–8 weeks. Pro tip: Use a humidity dome or plastic bag to speed up the process!
Are olive leaf trees prone to pests or diseases?
Olive leaf trees are generally pest-resistant, but watch for scale insects or aphids on new growth. Treat with neem oil or insecticidal soap if needed. Fungal issues like verticillium wilt can occur in waterlogged soil—ensure proper drainage and avoid overhead watering to prevent problems.
Still stumped? Drop your question in the comments—we’re happy to help your olive leaf tree reach its full potential!
Wrapping up and next steps
Growing an olive leaf tree is a rewarding journey that blends patience, care, and a touch of strategic pruning to unlock its full potential.
Whether you’re harvesting lush foliage for tea, enjoying its ornamental beauty, or simply savoring the fruits of your labor, the key lies in understanding its needs—from seasonal trims to proper tools. With the right techniques, your tree can thrive year-round, offering both practical benefits and natural elegance to your space.
Ready to take the next step? Start by observing your tree’s growth patterns and adjusting your pruning schedule as needed. Small, consistent efforts will lead to big rewards—so grab those shears and get pruning! 🌿✂️