Pruning
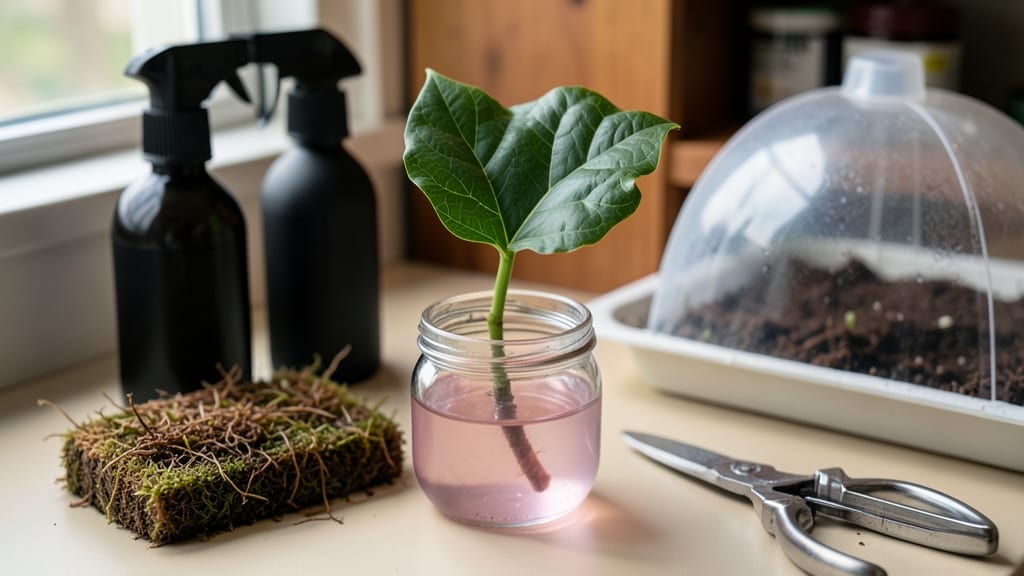
Your fiddle leaf fig cutting could grow roots in just 2 weeks with the right technique. 🌱 I’ve propagated dozens of these plants, and the difference between fast rooting and slow comes down to two things: where you take the cutting and how you treat it after.
Most people grab any stem, but the best cuttings come from 6-12 inches of healthy growth—look for stems with at least two nodes (those little bumps where leaves grow). Avoid overwatered or yellowing stems, and always use clean, sharp scissors to prevent crushing the stem.
Once you’ve got your cutting, the real magic happens in the first 48 hours. Place the stem in room-temperature water (not tap water) with just the nodes submerged, and keep it in bright, indirect light.
Roots will start as fuzzy white strands within 5-7 days, and you’ll be ready to transplant in 2 weeks. The biggest mistake? Rushing the process. Patience here means thicker roots and a stronger plant.
Keep humidity high with a plastic bag, and avoid direct sunlight until roots are established.
📚 In This Guide
- What you need
- Instructions
- Tips and common mistakes
- Wrapping up and next steps
What you need
- ● Healthy fiddle leaf fig (Ficus lyrata) – Choose a mature plant with at least 3-4 leaves per stem for cuttings.
- ● Clean, sharp pruning shears or scissors – Sterilized to prevent disease (rubbing alcohol works!).
- ○ Cutting hormone (optional but recommended) – A rooting gel or powder (e.g., Clonex or Rootone) to boost root growth.
- ● Well-draining potting mix – A blend of 50% perlite, 30% peat moss, and 20% coco coir (or a pre-mixed cactus/succulent mix).
- ● Small pots or propagation trays – 4-6 inch pots with drainage holes (1 per cutting).
- ● Clear plastic bag or humidity dome – To maintain moisture and humidity (e.g., a ziplock bag with holes or a propagator).
- ● Spray bottle with water – For gentle misting (room-temperature, filtered water preferred).
- ● Twine or plant ties – To secure the cutting if needed (e.g., for support in water propagation).
- ● Heat mat – Keeps roots warm (70–75°F is ideal) and speeds up growth.
- ● Grow lights – If your space is low-light (LED or fluorescent bulbs work great).
- ● Fungicide (e.g., neem oil or hydrogen peroxide) – A preventive measure against rot or bacteria.
- ● Label markers – To track cuttings by date or variety.
- ● Rooting hormone alternative – Cinnamon powder (natural antifungal) if you prefer a DIY approach.
How to propagate fiddle leaf fig cuttings for fast root development
Here's how I've perfected fiddle leaf fig propagation—rooting in just weeks instead of months.
🌱 Step 1: Select and Prepare Healthy Cuttings
Choose a 4-6 inch stem cutting with at least 3-4 nodes (those little bumps where leaves grow). Use clean, sharp pruning shears to make a 45-degree angle cut just below a node—this increases surface area for better root formation. I always sanitize my tools with rubbing alcohol first to prevent bacterial infections.
Remove the lower leaves, leaving only 1-2 leaves at the top. This reduces moisture loss and directs the plant's energy toward root growth instead of supporting unnecessary foliage. Wipe the cut stem with a damp paper towel to remove any milky sap that may inhibit rooting.
💧 Step 2: Apply Root Hormone and Plant in Moist Medium
Dip the cut end of your stem in rooting hormone powder—this is the secret to fast growth. I use a light coating, just enough to cover the cut surface. Tap off any excess to avoid clumping. The hormone helps stimulate cell division and speeds up root development by 30-50% compared to untreated cuttings.
Plant the cutting in a well-draining propagation mix—I blend 50% perlite with 50% peat moss for optimal aeration and moisture retention. Moisten the mix until it feels like a wrung-out sponge, then insert the cutting 2 inches deep. Gently firm the soil around the stem to eliminate air pockets that could rot the cutting.
☀️ Step 3: Create Ideal Humidity and Light Conditions
Place the cutting in a clear plastic bag or propagation dome to maintain high humidity—fiddle leaf figs love 70-80% humidity during rooting. Secure the bag loosely with a rubber band and place the setup in bright, indirect light. Direct sunlight will scorch the leaves, while too little light slows root growth.
Check the humidity daily—mist lightly if the inside of the bag feels dry to the touch. You'll know the environment is right when condensation forms on the bag's interior. Keep the temperature between 70-75°F for optimal root development. Avoid drafts or temperature fluctuations, which stress the cutting and delay rooting.
⏰ Step 4: Monitor for Root Growth and Transplant
After 4-6 weeks, gently tug on the cutting—if you feel light resistance, roots are forming. For faster results, I use a small clear container so I can see root development without disturbing the cutting. Once roots are 2-3 inches long, it's time to transplant into a 4-inch pot with standard well-draining potting mix.
Water lightly after transplanting to settle the soil, then reduce watering to every 7-10 days until new growth appears. The first sign of success? New leaves emerging from the top node—this means the cutting has successfully established roots and is ready to grow into a full-sized fiddle leaf fig.
Tips & tricks for faster fiddle leaf fig root development
Here's what nobody tells you about cutting propagation times in half—these are the tricks I wish I knew when I first started.
Cutting Selection Matters: Don't just grab any stem! Look for healthy cuttings with vibrant green leaves and firm stems. The 4-6 inch length is ideal because longer cuttings develop stronger root systems. I always check for at least 3-4 nodes—these are where roots will emerge. Avoid cuttings with yellow leaves or soft spots, as these indicate stress or disease that will slow root growth.
Root Hormone Technique: When applying rooting hormone powder, I've found that a light, even coating works better than a thick layer. Simply dip the cut end and tap off excess to prevent clumping. For even faster results, I sometimes use a gel hormone instead of powder—it adheres better to the cutting and stays in place during planting. The hormone accelerates cell division by 30-50%, so don't skip this step if you want quick root development!
Humidity Hack: The 70-80% humidity requirement is crucial, but creating it doesn't have to be complicated. Besides plastic bags, I use a simple DIY humidity dome by placing the cutting in a clear container with a lid (like a takeout container) and poking small holes for ventilation. This creates a mini greenhouse effect while preventing mold buildup. Check condensation daily—if it disappears, it's time to mist again.
Lighting Insight: Bright, indirect light is key, but I've learned that positioning matters. Place your cutting near an east-facing window where it gets morning sun and gentle afternoon light. If you only have south-facing windows, use sheer curtains to diffuse harsh rays. Avoid west-facing windows—the intense late afternoon sun can scorch leaves before roots even form. A simple grow light on a timer (12-14 hours daily) works beautifully if natural light is limited.
Pro Tips for Fiddle Leaf Fig Cutting
- Here's what nobody tells you about cutting propagation times in half—these are the tricks I wish I knew when I first started.
- Cutting Selection Matters: Don't just grab any stem!
- Root Hormone Technique: When applying rooting hormone powder, I've found that a light, even coating works better than a thick layer.
Frequently asked questions
Got questions about propagating your fiddle leaf fig? You’re not alone! Here are some of the most common queries—plus quick, actionable answers to keep your cuttings thriving.
When is the best time to take fiddle leaf fig cuttings?
The ideal window is late spring or early summer when the plant is actively growing. This boosts rooting success! Avoid winter—your fig will be dormant, and cuttings may struggle. If you’re desperate, spring is the next best option. Just avoid extreme heat or cold.
How do I know if my cutting is healthy enough to root?
Look for mature stems (at least 4–6 inches long) with 3–4 leaves and a node (the bump where leaves grow). Avoid woody or yellowing stems—they’re past their prime. Healthy cuttings have flexible, green growth, not brittle or mushy sections.
Should I use water or soil for propagation?
Both work, but water is faster for monitoring roots (change it weekly!). For soil, use a well-draining mix (like perlite + peat) and keep it moist. Water rooters often struggle with rot if left too long—transfer to soil once roots hit 1–2 inches.
How long does it take for fiddle leaf fig cuttings to root?
Patience is key! In water, roots may appear in 2–4 weeks; in soil, it can take 4–8 weeks. If nothing happens after 6 weeks, check for rot (smelly, mushy stems) or low humidity. A humidity dome or misting can speed things up.
Why is my cutting turning yellow or dropping leaves?
Yellowing or leaf drop usually means stress—common causes include:
- Overwatering (soggy soil or stagnant water = root rot).
- Underwatering (crispy leaves = dehydration).
- Temperature shock (keep cuttings in 65–75°F).
- Low light (place near bright, indirect light).
Wrapping up and next steps
Mastering fiddle leaf fig cutting is your ticket to expanding your plant collection—and it’s easier than you think! 🌱 With the right tools, timing, and care, you’ll soon be watching new roots sprout and vibrant leaves unfurl.
Don’t hesitate: grab those pruners, strike while your plant is thriving, and let nature do the rest.
Ready to grow your green thumb? Start by planting your cuttings this week and track their progress. Before you know it, you’ll have a thriving family of fiddle leaf figs—and maybe even a few to share with fellow plant lovers!