Pests and Diseases
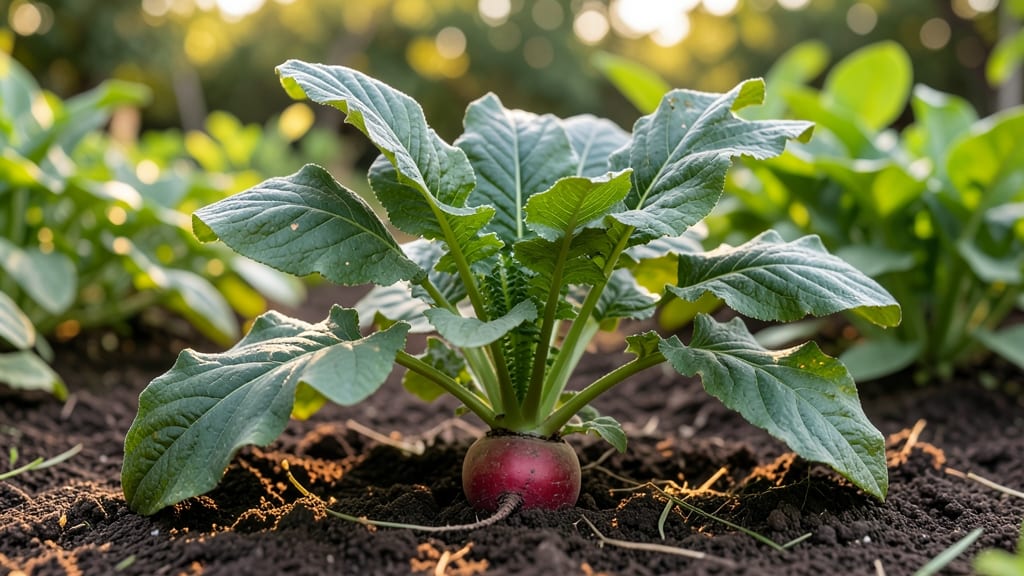
Spotting the difference in radish leaf identification saves your harvest from flea beetle swiss cheese or mildew mush. 🌱 I’ve spent years comparing leaves under my magnifying glass—from crisp, dark-green perfection to the telltale signs of pests or disease—and here’s the quick guide that’ll have you diagnosing like a pro in minutes.
Start with a healthy leaf: deep green, slightly waxy, and upright with no holes or spots. Compare it to your suspect leaves—aphid webs, mildew’s fuzzy gray coating, or the jagged edges of beetle damage all scream “problem.” Even yellowing or curling hints at nutrient issues or overwatering, not just pests.
The key is catching these early, before your radishes bolt or rot. By the end of this, you’ll confidently spot flea beetles’ tiny holes, downy mildew’s powdery patches, or the blackened veins of black rot.
No more guessing whether to spray, pull, or adjust your watering—just clear visual cues and fast fixes. Your radishes will thank you with crisp, sweet roots instead of sad, stunted ones. Works for home gardeners and market farmers alike.
Let’s get those leaves under the light—you’ll see the difference in no time.
📚 In This Guide
- What you need
- Instructions
- Tips and common mistakes
- Wrapping up and next steps
What you need
- ● Fresh radish plants: At least 3-5 healthy-looking plants (for comparison) and 1-2 potentially diseased or pest-infested plants (if available).
- ● Magnifying glass or handheld loupe: A 10x magnification tool for close-up inspection of leaf details.
- ● Notebook or smartphone: For jotting down observations (with a camera or note-taking app for photos).
- ○ Gloves (optional but recommended): Nitrile or latex gloves to protect hands from sap or pathogens.
- ● Ruler or measuring tape: For assessing leaf size and growth patterns.
- ● Field guide or reference book: A pest/disease identification guide for leafy greens (e.g., The Vegetable Grower’s Handbook).
- ● Small containers or bags: Paper or resealable plastic to collect leaf samples for further testing (if needed).
- ● UV flashlight: Helps reveal fungal or bacterial spots that aren’t visible to the naked eye.
- ● pH test kit: For checking soil pH (ideal range: 6.0–7.0 for radishes).
- ● Pruning shears: Sterilized for safely removing diseased leaves.
- ● Reference images: Printed or digital healthy vs. diseased radish leaf comparisons for side-by-side analysis.
- ● Spray bottle with water: For rinsing leaves to check for pests hiding on undersides.
Quick visual guide to radish leaf identification
Here's how to tell healthy radish leaves from diseased ones in seconds—no gardening degree required.
🌿 Step 1: Examine Leaf Color for Healthy Signs
Healthy radish leaves should be a vibrant deep green with a slightly waxy texture. Look for rich, uniform color from the center stem outward—no yellowing or browning at the edges. I always check the youngest leaves first because they show nutrient deficiencies or stress earliest.
Run your fingers gently over the leaf surface. Healthy leaves feel slightly firm with a crisp edge. If the leaf feels soft or mushy, that's your first sign of trouble—often from overwatering or fungal infection. Compare the top and undersides: healthy undersides are lighter but still green, never spotted or powdery.
🌱 Step 2: Check for Common Disease Patterns
Powdery mildew appears as white, powdery spots that spread like dust across the leaf surface. This fungal disease thrives in humid conditions and starts on the older leaves first. I've seen it turn entire plants white within a week if left unchecked—don't wait to act.
Look for yellow patches between the leaf veins. This could signal alternaria leaf spot, which starts as small brown spots with yellow halos. Unlike powdery mildew, these spots have defined edges and often appear on the lower leaves first. Run your thumb along the leaf edge—healthy leaves won't have these dark, crusty spots.
💧 Step 3: Inspect Stems and Leaf Edges
Healthy radish stems should be sturdy and upright, never wilted or collapsing. Check where leaves attach to the stem—the leaf axils should be clean, not sticky or discolored. Sticky residue is a sure sign of aphids or other sap-sucking pests.
Examine the leaf edges for uneven tearing or chewed holes. This usually means cabbage worms or slugs are visiting at night. I've had radish plants completely defoliated overnight by slugs—always check the soil surface around the base for slimy trails.
✂️ Step 4: Compare Leaf Shapes and Growth Patterns
Healthy radish leaves grow in a rosette pattern, with leaves emerging evenly from the center. If you notice one side of the plant growing much larger than the other, that's a sign of nutrient imbalance or root damage. I've seen this happen when plants get root-bound in containers.
Look at the leaf shape itself. Healthy radish leaves are lobed and slightly hairy along the veins. If leaves appear smooth and glossy with no texture, that's often a sign of over-fertilization with nitrogen. Compare a few leaves—healthy ones should all look similar in shape and size.
☀️ Step 5: Test for Moisture Stress Signs
Underwatered radish leaves develop a dull, grayish-green color and often curl inward at the edges. The veins remain green while the leaf tissue between them turns pale. I always check the soil moisture at this point—if the top inch is bone dry, that's your answer.
Overwatered leaves look yellow and limp, often with blackened tips. The stems may appear hollow or mushy when pressed gently. Stick your finger 1 inch into the soil—if it feels cold and soggy, you're overwatering. Healthy radish plants should have soil that feels moist but not wet at this depth.
Tips & tricks for perfect radish leaf identification
These quick visual cues will help you spot problems before they spread—and save your harvest.
The Leaf Texture Test: In Step 1, when you're checking leaf firmness, press gently near the leaf's base. Healthy leaves should spring back immediately when released, like a well-made mattress. If it stays dented or feels spongy, that's your first warning sign of overwatering or rot setting in. I've seen this happen when gardeners water on a strict schedule without checking soil moisture first.
Disease Pattern Timing: In Step 2, remember that powdery mildew starts on older leaves first because they're more exposed to humidity. If you spot white dust on the lower leaves, act immediately—this spreads to younger leaves within 48 hours if conditions stay humid. I've had entire radish beds turn white overnight during rainy seasons, so I always check the bottom leaves first when humidity rises.
Pest Inspection Shortcut: For Step 3, turn your radish plants upside down and give them a good shake over a white sheet of paper. Any tiny green bugs (aphids) or slimy trails (slugs) will become instantly visible. This method catches pests I'd otherwise miss when just looking at the leaves from above. Do this every 3-4 days during growing season for best results.
Growth Pattern Clues: In Step 4, if you notice leaves growing in uneven sizes or one side of the plant looks stunted, gently dig around the roots. Root-bound plants often have circling roots that strangle themselves. I've fixed this by loosening roots in containers and repotting with fresh soil—it gives plants a second chance to grow evenly.
Pro Tips for Radish Leaf Identification
- These quick visual cues will help you spot problems before they spread—and save your harvest.
- The Leaf Texture Test: In Step 1, when you're checking leaf firmness, press gently near the leaf's base.
- Disease Pattern Timing: In Step 2, remember that powdery mildew starts on older leaves first because they're more exposed to humidity.
Frequently asked questions
about radish leaf identification—because even the greenest thumbs need a little clarity! Here are answers to the most common queries to keep your radish patch thriving.How do I tell if a radish leaf is healthy vs. diseased?
Healthy radish leaves are vibrant green, firm, and free of spots or yellowing. Diseased leaves often show pale patches, dark spots, or mushy texture. Compare them side by side—if yours look dull or deformed, it’s time to investigate further!
When is the best time to check my radish leaves for pests or diseases?
Inspect your radish leaves weekly, especially after rain or watering. Early morning is ideal—dew can highlight issues like powdery mildew or aphids. Pro tip: Use a magnifying glass for close-ups!
Can I still harvest radishes if the leaves look bad?
Yes! Radishes grow from the root, so focus on the leaves only if they’re severely diseased (like with clubroot). If it’s just cosmetic (e.g., aphids), remove affected leaves and keep harvesting. Warning: Avoid eating leaves with fungal spots.
What can I use instead of radish leaves in recipes?
Radish leaves are peppery and mild—great substitutes include arugula, mustard greens, or spinach. For a similar texture, try watercress. Swap 1:1 in salads or sautés, but adjust seasoning (radish leaves are milder than arugula).
My radish leaves are yellowing—what’s wrong?
Yellowing leaves usually mean overwatering, nutrient deficiency (like nitrogen), or pests. Check soil moisture and adjust watering. If the yellowing is crinkled, it could be flea beetles. For spots, test for downy mildew or bacterial infections.
Wrapping up and next steps
Identifying healthy radish leaves from diseased ones is a game-changer for thriving gardens! 🌱 By now, you’ve learned to spot yellowing, wilting, or spotted leaves—key red flags for pests or disease. Remember, early action keeps your radishes happy and harvests bountiful.
Ready to put your new skills to work? Start checking your radish patch today! If you spot trouble, act fast—whether it’s pruning, adjusting water, or treating naturally. Happy gardening! 🌟